Past Enrollments In Canvas: Limiting or Extending Student Access to Official Canvas Course Shells
This document addresses what happens
- In Canvas after your course end date
- Access students and instructors have by default
- How to choose a different level of access for your students before the term finishes
Student access privileges can only be modified by the instructor prior to the end of the term.
When your course concludes is based on your course’s end date, courses are moved from "Current Enrollments" to "Past Enrollments."
When a course moves to "Past Enrollments" it is no longer used for active teaching; it becomes a read-only archive copy of the course.
NOTE: A Learning Management System like Canvas is not an archive. Instructors should not rely on the LMS to keep instructor-created materials or grades from past courses. Instructors should keep their own copies of all materials and grades they wish to preserve.
Please refer to the following Canvas Community Guides for more information.
Once the course’s set end date is reached, the course will be available for students to view in read-only form. Students and instructors will not be able to edit or submit assignments, change due dates, upload files, change course settings, or otherwise interact with the course. However, students and instructors will continue to be able to view all content they could access during the term. For students, this includes all published modules, assignments, quizzes, etc. For instructors, this includes all aspects of the course, including hidden navigation tabs and feedback given in SpeedGrader. Additionally, instructors can copy information from a closed course to an open course by using the "Import Course Content" tool.
Please refer to the following Canvas Community Guide for more information on Importing Course Content.
For some instructors, the default level of post-term access is acceptable. Other instructors may wish to change the course end date before the term ends in order to ensure the read-only copy of the course fits with how they wish their students to access it post-term.
While instructors cannot change the level of access available after the course concludes, instructors are able to edit the course before the course conclusion date is reached.
This guide provides instructors for the following in order to change levels of post-term student access:
A. Grant additional access to the course by extending the specified end date
B. Limit User Participation Dates
C. Restrict access to course content
ALL CHANGED MUST BE COMPLETED BEFORE THE CURRENTLY SPECIFIED END DATE OF THE CANVAS COURSE
A. Grant additional access to the course by extending the specified end date
This action will allow students to continue to have full-access to the course based on an end date that the instructor defines.
This can be done at any time during the course scheduled dates, but it must be done before the course end date as specified within Campus Solutions.
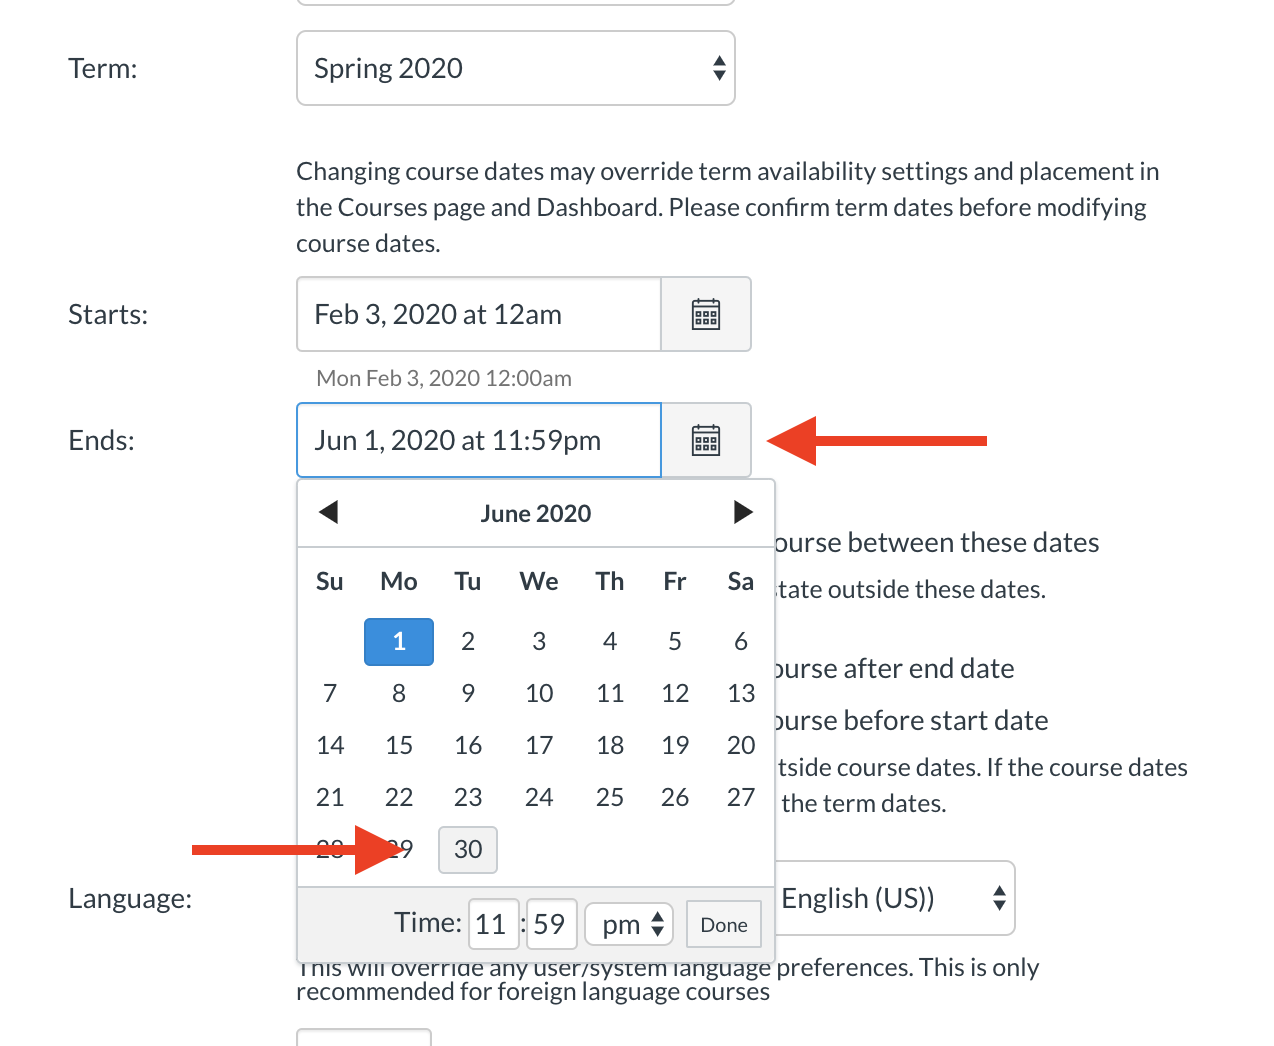
1. Extend the Existing End Date
a. Click on Settings listed at the bottom of the course menu
b. Go to the Course Details tab
c. Refer to the Course Start and End dates section
d. Click the “ENDS” calendar icon. Select a new end date for the course.
e. Save by clicking the blue "Update Course Details" button located at the bottom right hand corner of the page
B. Limit User Participation Dates
You can set whether or not students can only participate in the course during the specified course dates using the Student Participation checkbox. Participation means that students can submit assignments, post discussions, upload files, or take part in any other action-based task within a course. If you limit students to only be able to participate during the course dates students can access the course, and look at content, but they cannot fully participate until the first day of the course. When the course is concluded, the course is placed in a read-only state.
This can be done at any time during the course scheduled dates, but it must be done before the course end date as specified within Campus Solutions.
This is a two-step process: Instructors need to limit the course participation dates and the visibility.
1. Restrict Participation Dates
a. Click on Settings listed at the bottom of the course menu
b. Go to the Course Details tab
c. Make sure that the correct start and end dates for the current course are set in the calendar boxes
d. Check the box marked "Users can only participate in the course between these dates"
e. Save by clicking the blue "Update Course Details" button located at the bottom right hand corner of the page.
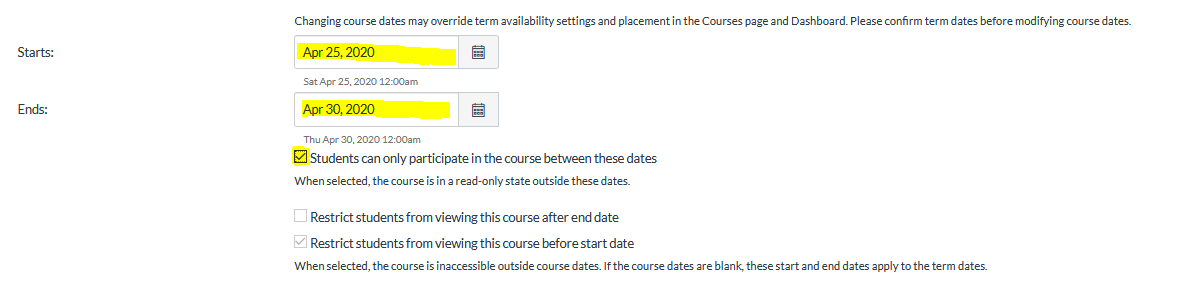
2. Make the Course Invisible to Students After the End Date
a. Click the check box "Restrict students from viewing course after the end date"
b. Save by clicking the blue "Update Course Details" button located at the bottom right hand corner of the page.
C. Restrict access to course content
Instructors can choose to hide entire content areas (like Quizzes or Discussions), individual modules, or files. These actions will hide some parts of the course, while keeping others accessible.
Instructors cannot unpublish individual assignments, discussions, or quizzes if student work has been submitted. If instructors wish to restrict access to any one of these items, they must hide the entire content area from the course menu.
Some items may be accessed from multiple content areas. For example, if an instructor hides the Assignments area, but shares a link to an individual assignment in Modules, students will be able to access the material through Modules.
Instructors should use Student view to check that all content they wish to hide from students is inaccessible.
1. Hide content areas from the course menu
a. Click on Settings listed at the bottom of the course menu
b. Click the third tab "Navigation"
c. Move the content areas you wish to hide into the lower portion of the screen. You can do this by dragging and dropping the name of the content area or by clicking the gear icon and selecting either "disable" or "move"
d. Click the blue save button located at the bottom of the page
For more details, please refer to the following Canvas Community Guide for information on how to manage Course Navigation links.
2. To restrict access to an individual module
a. Go to the Modules content area
b. Next to the title of the module you wish to hide, click the green checkmark once to un-publish the module. This will make all items contained within that module invisible.
c. Changes will be saved automatically
Please refer to the following Canvas Community Guide for more information on how to publish/unpublish a module.
3. Check our work in Student View
a. Click on Home
b. Refer to the Homepage sidebar located in the right-hand column and click on "Student View".
c. Make sure the course looks the way you would like it to look for your students
d. Exit Student View by clicking on the "Leave Student View" button located in the bottom right-hand corner of your screen
Please refer to the following Canvas Community Guide for more information on how to use the Student View feature from within a Canvas course.